
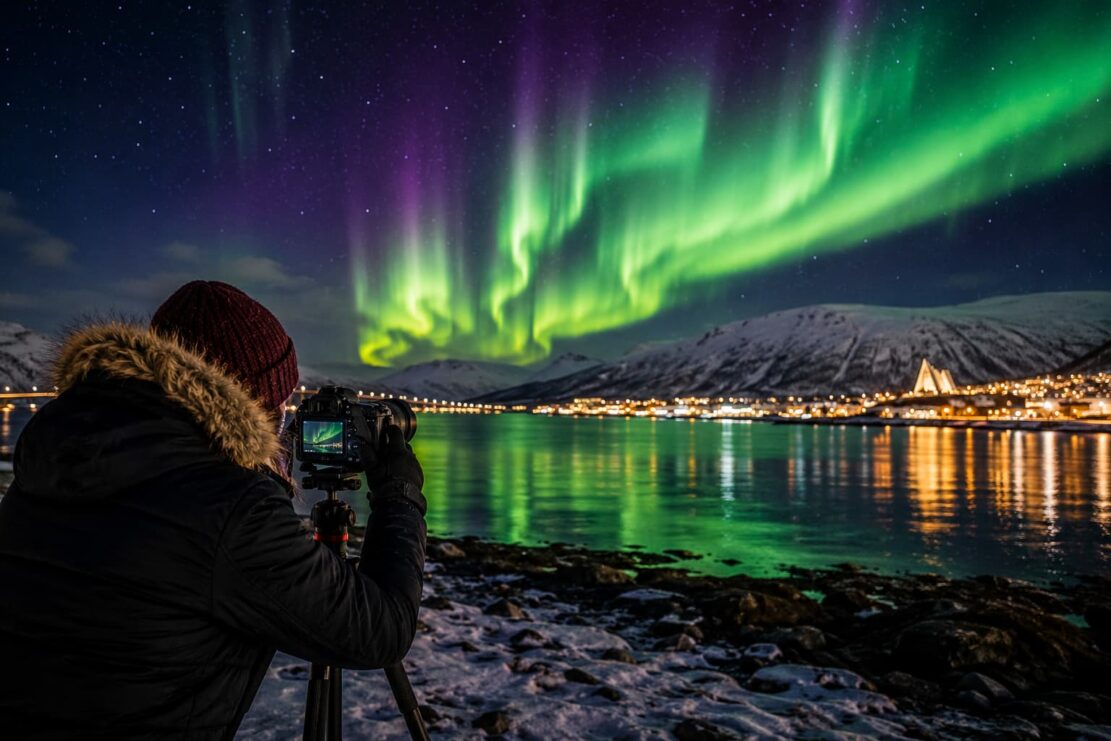
Photographing the aurora borealis is the kind of challenge that makes photographers rethink assumptions they didn’t know they had. The subject is unpredictable, the light is alien, the environment punishes the unprepared, and the technical parameters that work in every other low-light context produce flat or blown results here. Getting a strong Northern Lights image requires understanding what is actually happening optically, not just following a preset exposure formula.
Tromsø, Norway sits at nearly 70° North — inside the auroral oval, the band of latitude where geomagnetic activity translates most reliably into visible aurora. It is one of the most accessible places on Earth to photograph the lights under real Arctic conditions. What that means for photographers is both an opportunity and a set of constraints that are worth understanding before arrival.
What You Are Actually Photographing
The aurora borealis is not a uniform light source. It is plasma energized by solar wind interacting with Earth’s magnetic field and atmosphere, producing emissions at specific wavelengths: oxygen emits green at 557.7nm and red at 630nm, nitrogen produces blue and purple tones at lower altitudes. The color the camera captures depends on the altitude of the activity, the intensity of the event, and critically, the spectral sensitivity of your sensor.
Human vision struggles with aurora color in real time. The eye’s rods, dominant in low-light conditions, are poor at distinguishing color. A strong aurora looks greenish-white to the naked eye; the vivid greens and purples that cameras record are real — the photons are genuinely there — but they require exposure time to accumulate enough signal to differentiate wavelengths.
This is why aurora photography is never about capturing what you see. It is about capturing what is there. Understanding that distinction changes how you approach settings, composition, and timing.
Camera Settings: The Parameters That Matter and Why
There is no single correct exposure for the Northern Lights. The intensity of an aurora event varies by orders of magnitude — from a faint green band that barely registers to a full-sky display with rays moving faster than you can track. Settings need to follow the light rather than precede it.
Aperture
The widest aperture your lens delivers with acceptable sharpness is your starting point. f/2.8 is the practical standard; f/1.8 or f/2.0 can work if the lens holds sharpness to the edges at that aperture — many don’t. The goal is maximum light gathering with minimal optical penalty.
Wide-angle lenses are the natural choice for aurora work, but they come with field curvature and coma considerations that matter specifically for astrophotography. A lens that appears sharp at center wide open may show smeared star points toward the corners. This matters when you are composing an aurora against a field of stars: coma in the corners is immediately obvious. For aurora photography specifically, f/2.8 on a corrected wide lens often outperforms f/1.8 on a lens with uncorrected coma.
Shutter Speed
Aurora photography sits at the intersection of two competing exposures: long enough to gather sufficient light, short enough to record the aurora’s structure rather than averaging it into a blur.
A slow-moving arc can be photographed at 15–25 seconds without significant motion blur. An active, fast-moving display — curtains shifting and pulsing in seconds — blurs into amorphous green at 20 seconds. The stronger the activity, the shorter the required shutter speed.
Practical starting points by aurora activity level:
KP Index / Activity Shutter Speed Range Notes
KP 0–1 (faint arc) 20–30 seconds Motion blur is acceptable; structure is minimal
KP 2–3 (active arc) 10–20 seconds Reduce if curtains are moving
KP 4–5 (active curtains) 5–10 seconds Structure is the subject; blur loses it
KP 6+ (storm) 2–5 seconds Aurora moves faster than most people expect
The “500 rule” and “NPF rule” apply to star sharpness independent of aurora motion. At 24mm on a full-frame camera, the 500 rule gives 20 seconds before star trails appear. At 16mm, 31 seconds. For aurora work, star sharpness matters when the stars are compositionally significant; for displays that fill the frame, shorter exposures for structure often matter more.
ISO
Start at ISO 1600 and evaluate. Push to 3200 if the histogram is underexposed; pull back to 800 if a strong event is clipping highlights. Modern full-frame sensors handle ISO 1600–3200 with acceptable noise for aurora work; APS-C sensors generally perform better at 800–1600.
Noise in aurora images has a specific character: color noise in the dark sky areas, luminance noise in the aurora itself. Luminance noise in the green channel can be managed in post-processing; severe color noise in sky areas is harder to address without destroying the subtle color gradations in the aurora’s lower edge.
White Balance
Auto white balance typically renders aurora green, which is accurate for the dominant oxygen emission but tends to flatten the subtle color variation. Manual white balance in the range of 3200–4500K preserves the visual relationship between the green aurora and the dark blue-black sky. Shooting in raw allows post-processing adjustment, but setting a consistent manual value during the shoot produces more consistent results when processing a sequence.
Focus
Manual focus is required. Autofocus struggles or fails completely at night. The technique: during setup, while there is still faint twilight or using a bright star or distant light, set focus to hyperfocal distance for your focal length and aperture, confirm in live view at 10x magnification, and tape or mark the focus ring.
For wide lenses below 20mm at f/2.8, the hyperfocal distance is often 3–5 meters — meaning the lens focused at a point that close will render everything from half that distance to infinity as acceptably sharp. Verify this calculation for your specific lens; don’t assume the infinity mark on the barrel is accurate.
The Arctic Environment and Its Equipment Demands
Tromsø’s winter temperatures run between -5°C and -15°C on most clear aurora nights, with wind chill extending the apparent cold significantly. This is not equipment-threatening by extreme standards, but it creates specific challenges that photographers who have only shot in temperate climates encounter for the first time.
Battery performance. Lithium-ion batteries lose approximately 20% of their capacity at -10°C and 40% at -20°C. Bring at least three batteries per camera. Keep spares inside an inner layer against your body, not in a bag pocket. Rotate warm batteries into the camera before they die rather than draining batteries in the cold completely.
Condensation and thermal transition. Moving from -10°C outside to a heated vehicle or interior is when cameras are most vulnerable. Moisture from warm air condenses immediately on cold metal and optics. The professional protocol: before moving inside, seal the camera in a zip-lock bag while still outside. The condensation forms on the bag, not the equipment. Leave the bag sealed until the camera reaches room temperature — typically 20–30 minutes.
Lens frost. The front element can frost over in humid Arctic air, particularly near fjords or bodies of water. A simple anti-dew heater band (the type used for telescopes) wrapped around the lens barrel draws just enough heat to prevent frost without introducing heat shimmer. Bring two; they fail in the cold.
Tripod behavior. Carbon fiber tripods are preferred over aluminum in Arctic temperatures — aluminum conducts cold into your hands during adjustment and can seize at joint points when wet snow freezes in the mechanism. At minimum, cover metal leg sections with foam insulation or tape.
Gloves and controls. Operating camera controls in thick mittens is genuinely difficult. Photographer’s gloves — a thin inner glove with removable fingertips — offer a workable compromise, though at -15°C with wind, any exposed skin needs to be managed actively. Familiarize yourself with your camera’s controls by feel before the trip so you can make adjustments without looking.
Composition in the Arctic: Working with Darkness
The Northern Lights require a landscape beneath them. The best aurora images are almost never sky-only; they use a foreground element to anchor the space, give scale, and create a visual relationship between the cosmic and the terrestrial.
Foreground in Darkness
The challenge in Tromsø is that aurora photography happens in near-total darkness, often in locations away from ambient light. You cannot see your foreground clearly when you are setting up. This requires pre-scouting in daylight — identifying fjord reflections, mountain silhouettes, isolated trees, ice formations, or structures that will frame the sky.
Tromso Norway Tours operates with guides who have spent hundreds of nights at these specific locations and know exactly which viewpoints produce the most compelling foreground relationships — elevated positions above fjords, locations where the aurora reflects in still water, sites with the iconic Tromsø mountain profile visible behind the display. This local knowledge is genuinely difficult to replicate from online research; the guides drive to wherever clear skies exist, sometimes 150–200 kilometers from the city, and they know what each location looks like in darkness.
Reflections
Water reflections are the most compositionally powerful feature of the Tromsø aurora landscape. When the display appears in still fjord water, the image doubles without symmetry — the water distorts the reflection slightly, adding movement and texture. The settings implication: reflections in calm water work well at 10–15 second exposures; longer exposures blur the water surface and lose the reflected aurora structure.
Silhouettes
The classic human silhouette in an aurora image requires a brief light source behind the subject — a headlamp, a phone, or a slow flash — timed to coincide with the exposure without overpowering the sky. The technique: position the subject between the camera and the display, fire a brief light at the beginning of the exposure, then kill the light and let the aurora accumulate for the remainder of the shutter duration. The result: a sharp, warm-lit silhouette against aurora sky.
Polar Night and Twilight Windows
Between November and January, Tromsø experiences polar night — the sun never rises above the horizon. This produces an extended blue hour at midday: a 2–3 hour window of dim blue-gray twilight that is extraordinary for landscape photography even when aurora conditions are absent. The light is directional, soft, and even, with no harsh shadows and a quality that indoor artificial light cannot replicate.
For photographers who want to use Tromsø beyond aurora sessions, the midday twilight window produces some of the most distinctive landscape images the city offers: snowy mountain ridges in pure blue tones, dark fjords under colorless sky, and a visual atmosphere that photographs almost like fiction.
Wildlife Photography in the Arctic: Specific Challenges
Tromsø’s accessible wildlife — humpback and orca whales, reindeer, sea eagles — presents technical challenges that studio and landscape photographers often underestimate.
Whale Photography
Whale watching trips from Tromsø operate on boats with slow sea movement, distant subjects, and unpredictable surface appearances. The technical setup: a telephoto zoom in the 200–500mm range, continuous AF with subject tracking, shutter priority at 1/800 or faster to freeze surface splash and water motion, ISO auto with a ceiling of 3200, and burst mode. The practical reality is that the moment of a breach or flukes-up dive lasts 1–3 seconds; preparation is the whole game.
For photographers on the sustainable whale watching hybrid-electric catamaran operated through Tromso Norway Tours, the silent engine is a significant technical advantage: it allows the vessel to approach whales more closely without triggering avoidance behavior, producing closer, more detail-rich images than motor-noisy alternatives allow.
Reindeer Photography
Reindeer at close range — during a Sami cultural experience — are accessible, slow-moving subjects at distances of 3–10 meters. A standard 24–70mm or 24–105mm zoom is appropriate. The challenge is the light: overcast Arctic winter light is even and flat, well-suited for natural-toned animal portraits but lacking drama. A slight fill from a snow reflector or a low camera angle that places the animal against sky rather than snow ground produces cleaner separations.
Sea Eagles
Sea eagles (Haliaeetus albicilla) appear along Tromsø’s fjord coastlines on wildlife tours. They are large — wingspan to 2.4 meters — but erratic in movement. At minimum, 400mm effective focal length, 1/1000 shutter for flight, AF tracking. On overcast days, ISO 1600–3200 is typically required to achieve those shutter speeds without underexposure.
Post-Processing Aurora Images
Raw files from aurora shoots require specific processing approaches.
Noise reduction first, before sharpening. Aurora images typically have significant luminance noise in sky areas. Running noise reduction before any sharpening prevents the sharpening pass from emphasizing noise grain.
Green channel handling. The dominant oxygen emission produces a specific green that can appear oversaturated or unnatural in standard profiles. Reduce green saturation slightly and shift the green hue toward yellow to produce a more natural-feeling aurora color. The camera’s raw green channel will have captured accurate emission color; the issue is typically in how profile calibration renders it.
Gradient tools for sky/ground relationship. Aurora images often have bright sky and dark foreground. A radial or linear gradient tool, reducing exposure and highlights in the sky separately from the foreground, recovers the aurora’s internal structure without crushing the ground.
Stacking for noise reduction. For static aurora compositions where the lights are not moving dramatically, stacking 3–5 exposures aligned in software (Sequator for aurora, Starry Landscape Stacker for Mac) reduces noise significantly without losing resolution. The aurora averages into a cleaner, smoother result; fixed stars align; ground terrain stays sharp. This approach is impractical for fast-moving aurora but valuable for slower arc phases.
Practical Preparation Before the Trip
Monitor space weather. The NOAA Space Weather Prediction Center publishes KP forecasts 1–3 days out; the Norwegian Meteorological Institute’s YR.no application provides the most accurate local cloud cover forecasts for Tromsø’s microclimates. Aurora photography is fundamentally weather and space weather dependent — checking both every evening is the minimum.
Protect the golden window. Tromsø’s arctic coastal weather changes faster than almost anywhere. A forecast of clear skies at 6pm can be cloud-covered by 9pm. Guides who chase clear skies regionally — sometimes crossing into Finnish Lapland when the Norwegian coast clouds over — consistently outperform fixed-location aurora viewing. The photography guides embedded in Tromso Norway Tours‘ small-group aurora chases provide real-time decision-making about positioning, which is something no amount of individual weather monitoring can replicate once you are in the field.
Download the SpaceWeatherLive and Aurora Forecast apps. Both provide real-time KP readings, historical activity at your location, and short-term forecasts. The data these provide is the same data tour guides use; having it yourself lets you understand what your guide is reading when deciding whether to reposition.
Pack appropriately for hours of stillness. Unlike most photography assignments, aurora photography involves extended waiting in cold static conditions. Photographers who have spent time in the field know the difference between being cold because you are working and being cold because you are standing still. Hand warmers in every pocket, a thermos, and proper Arctic base layers are not optional.
What the Best Aurora Images Have in Common
Reviewing professional aurora portfolios from Tromsø and northern Norway reveals consistent structural elements: a foreground with genuine geographic identity, aurora that fills more than half the frame vertically, visible color differentiation within the display, stars that are sharp enough to read as individual points, and an exposure that shows the aurora’s internal structure — bands, rays, and curtain folds — rather than rendering it as a uniform glow.
These outcomes are achievable with current camera technology and the settings framework above. What they require is access to the right locations at the right moments, which in Tromsø means being in the right place when the conditions align — usually away from the city, somewhere that requires knowledge to reach.
[For more on photography technique, studio practice, and visual craft, explore the articles on this site.]
About the author: Written by a travel and landscape photographer with extensive experience shooting in Arctic conditions, including Northern Lights expeditions in Norway, Iceland, and Finland.